What if you needed to install Raid10 and CentOS-6 on a remote, unformatted server but had no way of accessing the server? You could try asking someone at the remote location to help you bootstrap the server, but that is not always possible. You could make an onsite visit, but that is undesirable. KVM-over-IP and IPMI are hardware solutions, but are expensive and require network setup.
This tutorial demonstrates how to access a remote, unformatted server in a fast, secure, simple and inexpensive way. It will show how to remotely provision the server with Raid10 and CentOS-6.
We will use a remote access service from SOFIns (www.sofins.com) to boot the remote computer and set up a secure tunnel for ssh and vnc access. We will need someone at the remote location to insert a SOFIns boot disk into this server, attach power and network and then turn it on. That is all they are required to do. We can do the rest remotely.
SOFIns works by booting the remote server with a live Linux operating system. SOFIns creates a VPN tunnel between the remote computer and a SOFIns' gateway. We use the gateway to log into the live Linux operating system that has booted the remote server.
Here are the procedures to set up Raid10 with a CentOS-6 on a remote server that we access via SOFIns.
Remote login via SOFIns gateway
-
Register and login to "sofins.com".
Once signed in, enter "SOFIns Controls" and click on the icon "+A" besides "Unassigned" to create a new boot disk agent.
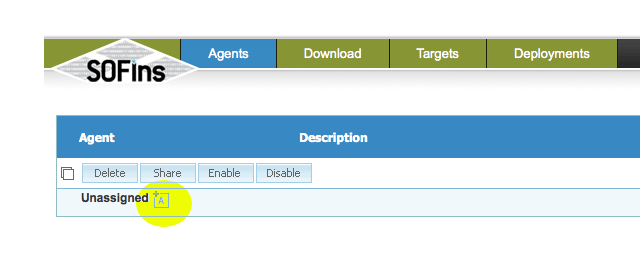 Select the checkbox besides the new agent that is created and click on the "Share" button.
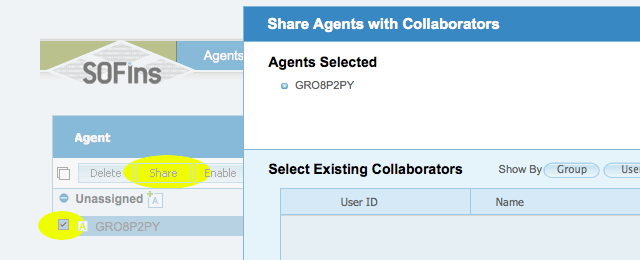 Enter email address of person to share the agent with and select "Offer assistance" tab and click "OK".
This will send out the invite, where the client accepts and downloads the iso and boots the server off of the CD created from the iso.
Once the client boots up the remote server, it will show up under the "Targets" page.
 In The "Targets" page, click on the "Authorize Access" tab to "Enable" access and get the required ssh credentials to log in to the remote server via ssh.
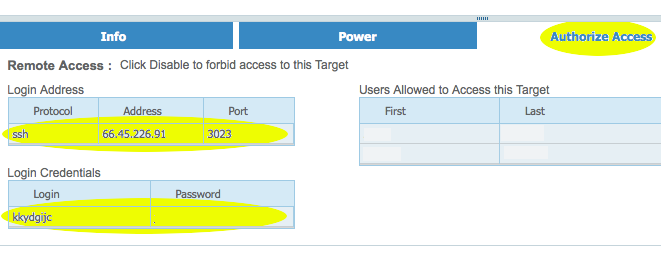 Login via ssh to the IP and port specified on the "Access" page.
RAID10 Setup
-
/boot partition will be on raid1 (/dev/md0)
Rest of partitions will be on lvm over raid10.
Change to root shell via `su -`.
You can now perform the RAID10 setup on the new unformated drives.
fdisk /dev/sda/dev/sda2 - rest (linux raid autodetect)
Clone the sda partition table to other drives:
sfdisk -d /dev/sda | sfdisk /dev/sdb
sfdisk -d /dev/sda | sfdisk /dev/sdc
sfdisk -d /dev/sda | sfdisk /dev/sddmknod /dev/md0 -m 0660 /dev/md0 b 9 0
mknod /dev/md1 -m 0660 /dev/md0 b 9 1
chgrp disk /dev/md0 /dev/md1
mdadm -C /dev/md0 -l 1 -n 2 /dev/sd{a,b}1 -x 2 /dev/sd{c,d}1
mdadm -C /dev/md1 -l 10 -n 4 /dev/sd{a,b,c,d}2
mke2fs -j -m0 /dev/md0 Next we will setup grub to load pxeboot image and run the installer via VNC connection.
GRUB Setup
-
Setup the grub bootloader to pxe boot the server upon reboot bringing up a vnc connection.
mkdir /mnt/boot
mount /dev/md0 /mnt/boot
/usr/sbin/grub-install --root-directory=/mnt hd0timeout 3
default 0
title Centos Install (PXE)
root (hd0,0)
kernel /centos6/vmlinuz vnc vncpassword={PASSWORD} headless ip={IP} netmask=255.255.255.0 gateway={GATEWAY} dns=8.8.8.8 ksdevice=eth0 method=http://mirror.centos.org/centos-6/6.0/os/x86_64/ lang=en_US keymap=us
initrd /centos6/initrd.imgNote: Replace PASSWORD, IP and GATEWAY appropriately. Use `ifconfig` and `route -n` to locate the IP and GATEWAY. We are also using 8.8.8.8 which is google DNS servers.
Download the pxeboot kernel image:mkdir /mnt/boot/centos6
cd /mnt/boot/centos6
wget http://mirror.centos.org/centos-6/6.0/os/x86_64/images/pxeboot/initrd.img
wget http://mirror.centos.org/centos-6/6.0/os/x86_64/images/pxeboot/vmlinuzInstall CentOS-6 on RAID10 partition
-
Once the pxeboot comes up, connect to the server via vnc client on port 5901 to begin the OS install. You should be presented with the below screenshot once the vnc session is established.
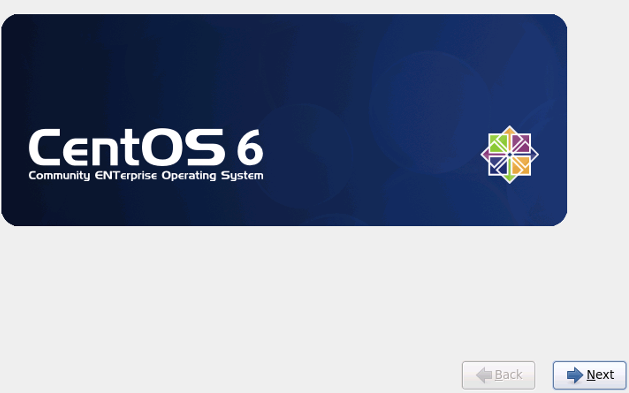 This should be a normal install, except when you get to the part of doing the custom partition. Select "Create Custom Layout" when you get to the point of selecting the installation type.
The installer should detect all of the custom partitions and detect the raid setup. Create a physical volume of the "md1" raid10 device and create the corresponding logical volumes for the root and swap partitions.
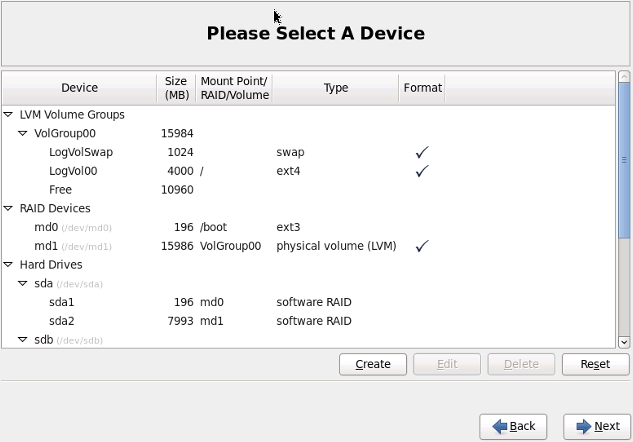 Do not set to format the /boot partition as it should already be detected as ext3.
The rest of the install should be quite straight forward. So, there you have it... a remote install of CentOS-6 on RAID10 with the help of SOFins boot disk.
FULL DISCLOSURE
The author is part of the SOFIns development team.